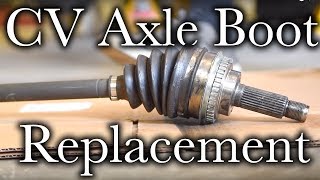
1996 - 2000 Toyota Rav4 CV Boot Replacement FULL DIY; Toyota CV axle boot kit shown
This video is a full DIY for replacing CV boots using a Toyota CV boot kit. The video shows how to remove the front left axle on a '98 Rav4 AWD automatic, how to disassemble and axle and replace the boots, and how to reinstall the axle. This repair is very similar on many other Toyotas.
The "other video" mentioned in this video is an even more detailed DIY which shows the shaft seal replacement, but does not show the boot replacement:
• 1996 2000 Toyota Rav4 CV Axle Repla...
Check the Pinned Comment for these Timestamps, part numbers, info, and video links:
Link to the "other video" mentioned (axle removal & shaft seal
replacement):
• 1996 2000 Toyota Rav4 CV Axle Repla...
01:15 Set brake, chock wheels, and lift the whole front end
03:25 Remove the wheel (21mm)
03:55 Remove the ABS sensor, if equipped (two
10mm bolts)
04:50 Remove the axle nut cotter key & cover
06:16 Loosen the axle nut (30mm nut, use a 6point
deep socket)
08:03 Remove the sway bar link (two 17mm bolts, H7
hex)
09:39 Remove brake line bracket (12mm)
10:07 Disconnect the tie rod end (17mm, rental tool
is OEM Tools 27276)
11:17 Disconnect lower control arm (17mm, two nuts
one bolt)
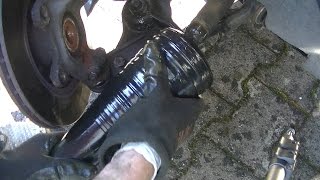
11:57 Remove the axle out from the wheel hub
13:25 Remove the axle cover (two 12mm)
14:02 Remove the axle from the transaxle (slider
hammer method shown, rental tool Powerbulit Kit 41 from Advance Auto; also check the other video for other
techniques)
16:00 Axle is on the bench; notes about the FSM
procedure
18:28 Start on the inboard side: remove the
bands/clamps
20:16 Make matchmarks on the shaft, cup, and
tripod collar
24:05 Remove the trip "snapring" (speared end
retaining ring)
24:49 Detail on a recommend tool for this ring (Lang
1407, Proto J250G, Lisle 44900 or similar)
25:42 Remove the tripod from the shaft using a
brass punch
26:55 Remove the inboard boot
27:18 Remove the outboard bands/clamps and boot
28:15 Inspect the outboard joint
28:38 Inspect the old grease, decide how to proceed
reboot axle or replace axle?
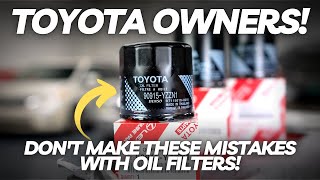
31:59 Very detailed information on the Toyota boot
kit: for this particular application ('98 Rav4 AWD
automatic) the part number is 0443812305; note
that some '99 and '00 Rav4's use part number
004438 12304. Verify your fit with you VIN and a
Toyota dealer.
35:49 How to verify which grease goes where
38:41 Prepare to install the outboard boot (inspect
and clean)
40:28 Grease the outboard joint (use grease 94304,
Raremax LFG(KAI), 120g)
41:04 Partially install the outboard boot
42:27 Add the rest of the grease to the outboard
joint
42:56 Snap the boot into place fully
44:35 Install the outboard boot bands/clamps
52:23 Partially install the inboard boot
53:33 Install the tripod and snap ring
57:03 Very close look at the tripod snap ring to
ensure proper install
58:20 Add grease to the trip, inboard boot & cup
(use grease 94166, Raremax SLF, 180g)
59:26 Install the inboard cup (tulip) to the boot
01:01:05 Install the inboard boot bands/clamps
01:04:58 Install the axle circlip
01:06:01 Note on the shaft seal (transmission seal)
01:06:29 Grease the shaft seal inner lip and the
circlip with MP grease
01:07:21 Reinstall the axle: be sure the circlip
opening is facing down
01:11:34 Note on regreasing the wheel bearings
while you're in here (I use Lucas XTRA Heavy Duty
Grease)
01:12:27 Reinstall the axle cover (12mm)
01:12:40 Reinstall the axle to the wheel hub
01:14:52 Connect the wheel hub to the control arm
(17mm, torque is 94 ftlbs)
01:16:32 Connect the tie rod end (17mm & use a
new 1/8" cotter key, torque is 36 ftlbs)
01:17:22 Reinstall the sway bar link (17mm & H7
hex, torque is 54 ftlbs)
01:17:48 Connect the brake line bracket (12mm)
01:17:53 Reinstall the ABS bracket and sensor
(10mm)
01:18:24 Torque down the axle nut (30mm, torque is
159 ftlbs)
01:19:28 Install the axle nut cover and a new 5/32"
cotter key
01:20:24 Install the wheel (21mm, torque is 76 ftlbs)
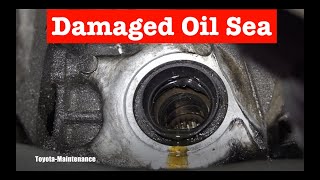
01:20:54 What an axle seal leak looks like (big mess)
01:21:35 Refill with ATF (or other fluid/oil for your
particular transaxle)
01:22:14 How to check the boot & seal after a test drive
Check back to the channel for (hopefully) another axle job for the passenger side axle (4WD auto), as well as a video for the cam plug DIY (to repair the oil leak seen at 02:12).
Check the channel for many other Rav4 videos.
Thanks for watching, and good luck with your repair!