After Effects Dynamic Anchor Point | Adobe After Effects Tutorial
Project file: https://www.dropbox.com/s/l1yhihrt9h3...
The Power of Shape Layers: https://www.udemy.com/course/powerof...
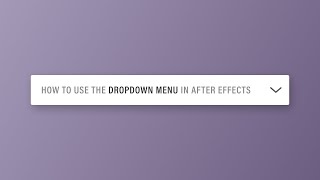
Hey everybody and welcome back to a very special episode of 7 Minute AE Tutorials where you learn tips, tricks, and shortcuts in 7 minutes or less. No BS, just AE. In this episode, I'm going to show you how to create a text box that automatically resizes itself based on the number of characters, words, and/or lines that are in your text layer. You'll also learn how to create a dynamic anchor point, which is huge. I literally use this expression every day to keep my anchor points centered, no matter how many characters, words, or lines I have on a text layer. These expressions can be saved as presets, so you don't have to memorize complicated expressions. I predict that these expressions will become a regular part of your everyday workflow.
COPY AND PASTE THE EXPRESSIONS BELOW:
On Text ANCHOR POINT:
layerBound = thisLayer.sourceRectAtTime(time);
T = layerBound.top;
L = layerBound.left;
W = layerBound.width;
H = layerBound.height;
[L+W/2,T+H/2]
Highlight ANCHOR POINT and go to ANIMATION/SAVE ANIMATION PRESET, and save this to DOCUMENTS/ADOBE/AFTER EFFECTS (version)/USER PRESETS
Add to a layer by clicking on the text layer, then go to your EFFECTS PANEL and search for the expression name you chose. Double click the expression and it will be added to your text layer.
On Rectangle Path SIZE of box:
s=((pickwhip the text layer))
w=s.sourceRectAtTime().width;
h=s.sourceRectAtTime().height;
[w,h]
Add an OFFSET PATHS, which will default to a value of 10 and provide sufficient padding. Then, highlight CONTENTS (which will grab everything within the contents layer, including the OFFSET PATHS) and go to ANIMATION/SAVE ANIMATION PRESET, and save this to DOCUMENTS/ADOBE/AFTER EFFECTS (version)/USER PRESETS
Add to a layer by clicking on an empty shape layer, then go to your EFFECTS PANEL and search for the expression name you chose. Double click the expression and it will be added to your shape layer. MAKE SURE to change the first line of this expression to match the name of the text layer to which it is being applied to.
NOTES:
Apply SET MATTE to the Text Layer that is using the Shape Layer as the matte in order to animate the text into the Box.
Be careful when parenting these layers to one another and be mindful of which options will allow you to get the desired effect. Tranform Property of the text layer will result in the box moving with the text if you are animating the text. Transform Scale of the box will affect the scaling of the text if you are animating the box. You can use Text Animator Position for the text, and Group or Shape controls for the box. Or you can apply a Transform effect to the text. However, applying Transform for Scale on the box will not get the desired effect.
It's recommended that you add a NULL OBJECT and simply parent both the text box and text layer to that Null Object. If you're a nerd like me, rename the Null Object to TEXT CONTROLLER.
I hope this helped you out. Please comment, like, share, and subscribe. Make sure to click the bell so you're notified every time I upload a new video. I'd love to get your feedback about this course and any other topic you'd like to see covered. Don't forget to check out my new Udemy course, the Power of Shape Layers. It's a comprehensive course that literally covers every aspect of shape layers. Thanks for watching, everybody. I'll see you next time.


