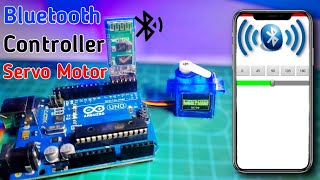
Arduino Servo Motor Control via Bluetooth | App Inventor

DIY Home Security New Video: • DIY Simple PIR Motion Home Security N...
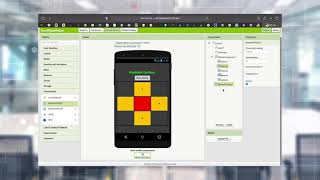
In this tutorial you will be creating an aplication for controlling a servo motor. Use slider in your application and move to servo motor from 0180.
Required Hardware:
Arduino Board:
https://goo.gl/UyGYeF (Banggood)
https://amzn.to/2LZr6t4 (Amazon)
Bluetooth Module :
https://goo.gl/thjwVL (Banggood)
https://amzn.to/3avtRM6 (Amazon)
Servo Motor :
https://goo.gl/Hxejko (Banggood)
https://amzn.to/3avwe1N (Amazon)
Jumper Wires :
https://goo.gl/VRzUN4 (Banggood)
https://amzn.to/3doetmT (Amazon)
Recommended Items:
Use Your Muscles in Project https://amzn.to/3wdL45C
37 Sensor & Module Packages https://amzn.to/3m66WeQ
Try this Robot Arm https://amzn.to/3fq8DCl
Best Resin 3D Printer https://amzn.to/39tY8KB
Arduino Compatible Kits http://bit.ly/2J2AFF7
Banggood Spring Sale https://bit.ly/3slMbOn
Important Advices :
Before uploading the code, remove the VCC cable from bluetooth module. If you use HC05 bluetooth module, it will ask the PIN to you. Usually 1234. If you get an error similar to (ERROR 507 or 516 broken pipe) please try to connect a few times. Sometimes connection will be broken.
Make sure that your Arduino board is connected to your computer via USB to enable serial communication through the serial monitor window of the Arduino Software (IDE).
I recommend you should't connect directly the servo motor to the Arduino Board. I suggest you use external power to the servo. SG90 Mini Servo motors can be used.
About the Code
The Arduino hardware has builtin support for serial communication on pins 0 and 1 (which also goes to the computer via the USB connection).
The SoftwareSerial library has been developed to allow serial communication on other digital pins of the Arduino, using software to replicate the functionality (hence the name "SoftwareSerial")
Digital pins 10 and 11 on your Arduino or Genuino boards are used as virtual RX and TX serial lines. The virtual RX pin is set up to listen for anything coming in on via the main serial line, and to then echo that data out the virtual TX line. Conversely, anything received on the virtual RX is sent out over the hardware TX.
Make sure that your Arduino or Genuino board is attached to your computer via USB to enable serial communication through the serial monitor window of the Arduino Software (IDE).
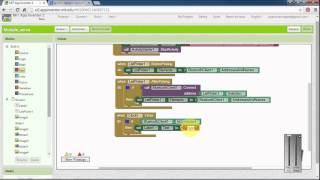
About the Application
Create your application with MIT App inventor.
http://appinventor.mit.edu/explore/
After completing the Program in MIT app inventor, go to Build and select App( save .apk to my computer).
Transfer the file to your android mobile phone or tablet.
Go to setting in your android mobile; select security and device administration and give access to allow install application from unknown sources.
Source Code & App: https://create.arduino.cc/editor/mert...
Social Media:
/ mertarduino
/ mertarduino