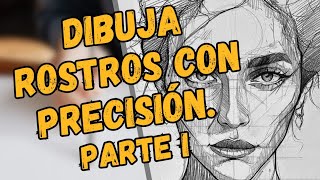
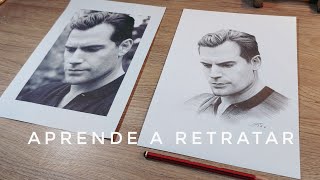
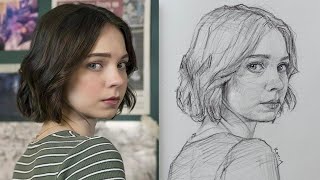
Cómo hacer retrato a bolígrafo-paso a paso

Enlace para descargar la foto de Elizabeth Taylor, gratuita: http://bit.ly/liztaylorfoto
Anímate a dibujar con bolígrafos, te muestro cómo hice paso a paso este retrato desde cero. Explico el proceso del boceto a lápiz y del sombreado y acabado a bolígrafo, paso a paso y con detalle.
MATERIALES UTILIZADOS
Hoja normal, blanca, de oficina: https://amzn.to/3vPJclK
Bolígrafo Bic color violeta (puedes usar azul o negro) y bolígrafo Bic rojo: https://amzn.to/35E4AQg
• Lápiz escolar 2B Noris Staedtler para el boceto: https://amzn.to/372XVQ0
Goma de Borrar Dust Free de Faber Castell: https://amzn.to/362HKSb
La foto de referencia (http://bit.ly/liztaylorfoto)
Tiempo que me ha llevado hacer todo el dibujo: aproximadamente 3 horas
ÍNDICE DEL VIDEO:
0:00 Presentación
3:15 Trazando el esquema Loomis
6:03 Definiendo los rasgos del retrato
26:21 Sombreando el retrato a bolígrafo
En este canal encontrarás videos sobre #dibujo #retrato #bolígrafo #diy
Sígueme en mi blog http://www.fancylooks.es
Sígueme en facebook: / fancylooksyt
Encuentra mis PLANTILLAS GRATIS en mi blog: https://www.fancylooks.es/plantillas...
Instagram: https://goo.gl/WcY3Bo
Pinterest: / fancylooksyt
Twitter: @FancylooksMarta
/ fancylooksmarta