Creating LANDSCAPES IN Blender with the Free ANT Landscapes Add-On
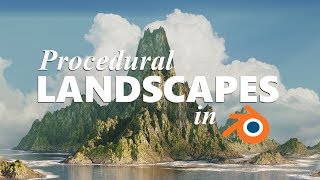
In today’s video, we’re going to talk about a free, builtin addon for Blender that allows you to quickly generate landscapes!
This addon should come loaded inside of Blender in a new installation. You can find it by going into your preferences, addons, and searching for A.N.T landscape. Note that you must include the periods for it to show up.
When you enable this addon, what it does is adds the ability for you to add a new kind of mesh – the landscape mesh. You add it just like any other kind of mesh – Shift+A, then under “Mesh,” look for “Landscape.”
This will add a landscape mesh into your Blender 3D workspace. You can adjust the landscape mesh by changing the various settings contained inside of the ANT menu.
Basically what this tool does is it adds a mesh inside of blender, then it uses noise functions to create different kinds of landscapes.
The first thing I want to point out, because it’s easy to miss, is there’s actually a dropdown with a number of different presets up above, so if you’re trying to create a certain kind of landscape, you might want to try to find something similar here, then build on top of that.
Once you’ve selected a mesh preset, you can adjust the settings down below to customize your mesh however you’d like. Adjustments are fairly easy, and as long as you have the refresh button above checked, they should happen live on your screen.
One thing to note – try not to click into the workspace – as soon as you do this, it will close down your window, which can be very frustrating. Note that you can tap the F9 key to open it back up unless you make another change in your window.
If you make another change in the window, you can still go back and make changes, but you’re going to edit with the menu that you can find by tapping “n” and clicking on the create button. Notice at this point, changes are no longer live – you have to click the “refresh” button to make changes.
The main settings section is going to adjust settings having to do with your overall mesh.
The subdivisions option controls the amount of geometric detail that’s going to be contained inside your mesh – more subdivisions = more detail, but also more geometry.
The mesh size will actually drive the size of the mesh that’s being created.
The noise settings are going to affect the noise that’s used to create the shape of your mesh. There are a TON of things you can adjust and change here, and notice that your options adjust based on the presets you select as well.
Let’s select the preset for “large terrain” to get a look at how this might work. The seed is going to adjust the base values that Blender uses to calculate your terrain – every time you change this, you get a completely different result.
The offset function will “move” your noise along the x and y axes, while the size will stretch the noise – be careful with this as it can create kind of a “distorted” look.
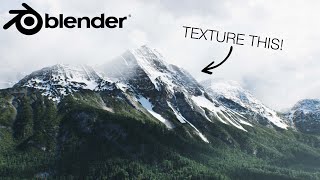
Now, let’s look at the displace settings – these settings adjust how high or low your mesh is generated. These can be used to create mountains, plateaus, valleys, and more!
The height adjusts how high the ups and downs of your landscape go. Note that you can set a limit to the height, which will then flatten off the tops of your mountains above a certain height.
The little double arrow will flip your landscape.
Falloff allows you to set if your noise goes all the way to the edges of your mesh, or if it gradually drops so the edges of your mesh stay flat.
Finally, the water plane adds a plane that you can apply a water material to to simulate water. We can talk about creating a shader in the future that simulated water.
That should give you a good idea of how the addon works – in the next video, we can talk a bit about how to apply materials to these objects to make them more realistic!


![Blender Quick Tip 003: Quick And Easy 3D Landscapes In Blender 2.8 [Beginner Tutorial]](https://i.ytimg.com/vi/IZXDDrXjwMA/mqdefault.jpg)