Don't throw away old scarves. I cut them all up and turned them into the right things.

1) Today I want to show how an original model is made from two pieces of a scarf.
What is needed for that?
You need to throw the scarf over one shoulder and decide on the length, the fringe fits into it. The length at the front and back should be the same.
Cut off the excess, for such a scarf it is 20 cm plus fringe.
I got this piece, 156 cm long. I pulled out the transverse threads from the cut part and formed a fringe.
The second piece is short, it is sewn at right angles to the first part of the poncho. Length 46 cm without allowances. When you apply these parts to each other, you need to make sure that the resulting neck toe is the same length on the right and left.
These parts were sewn on by hand using simple stitches.
When I tried it on in front at the neckline, I placed both parts a little further, since the fabric stuck out a little on the shoulders.
Ready!
In short, nothing is simpler. These comfortable clothes can be sewn in half an hour and are suitable for women of different sizes.
2) If you have an old scarf, it is perfect for warming your legs. A scarf that comes with fringe and is not knitted is especially good for this. Previously, men wore these, but now they make them wide and long for women so that they can be thrown over their shoulders.
First you need to make a pattern based on your leg. To do this, I put my foot on a sheet of paper and traced it, straightened the lines a little, and the template for the sole of the slippers is ready.
It will consist of 3 pieces of fabric: denim, padding polyester, thick cotton.
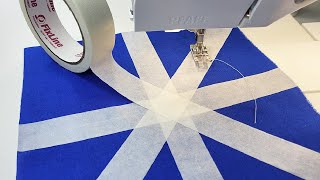
I connected all the layers and quilted them with diamonds on the machine.
Using a measuring tape, I measured the sole in a circle, from the mark on the heel, for me it is 64 cm.
I cut off the fringe of the scarf.
Cut out 2 strips 20 cm wide and 64 cm long.
I rolled them along the long side and placed padding polyester inside, and pinned all the layers together with pins. I sewed several parallel lines.
I made the edges of the strips oval and made small darts in the middle, cutting off the excess fabric on them.
Now assembling the slippers is more of a chuni.
On the sole on the denim side I marked the middle of the heel, and also marked the middle of the stripe.
I attached these two parts and connected them along the edge. Where the toe is, the edges of the strip overlap one another, forming an overlap at the front.
I trimmed everything and swept the cuts.
Chuni turned it around. I tried it on my leg and marked the overlap line so that it would not open, and sewed it up by hand.
I folded a strip of fringe and sewed it to the slippers.
Ready!
You can put them on a sock to make it even warmer, because it will be so nice to “dive” into such slippers in the evening and warm up after a hard day.
3) I come across bags that hardly wear out. You wear it for 56 years, and it’s like new.
A handsewn fabric bag can be an excellent replacement.
The fabric is dense but light; a great option for this is a stole scarf. The material is colorful, light, dense and does not fade.
Master Class:
1) I cut out 2 identical pieces 26 x 33 cm from a scarf and reinforced them on the wrong side with double tape.
2) The edges were rounded using circles. At the bottom I applied a diameter of 6 cm, at the top 28 cm.
3) I cut out exactly the same parts from the lining fabric.
4) I sewed pockets to the lining. To do this, I used strips of fabric 37x16 cm. I sewed a dividing line in the middle.
5) I cut out circles with a diameter of 15 cm from the jeans and lining and stitched them together. Then I cut them into 4 parts, turned them inside out and stitched them to the corners.
6) Denim handles made from strips 10x45 cm.
7) On the parts of the bag, from the top in the middle, I put 5 cm down and drew a transverse line of 8 cm. I sewed handles along the edges of this section.
8) Decorative element leather ovals.
9) Next, I cut out 4 strips 2 from the scarf and 2 from the lining fabric. I inserted a zipper between them, ideally it should be 42 cm long, if longer, cut off the excess.
10) Here I sewed loops along the short edges, which can then be used for a long handle.
11) To this part I sewed other parts of denim and lining fabric according to this pattern.
12) The result is the middle part of the bag.
13) I attached the side part with handles to this middle part and stitched it. She did the same with the other side.
14) I trimmed the seams and finished them with bias tape.
15) If you repeat everything step by step, you will succeed.
The bag, although not large, is very roomy.