Dual-Boot Windows 10 On An Unsupported Mac (2011 or Older) | Tutorial | RC Films

Check out my new, updated video how to install ANY version of Windows 10 onto an unsupported Mac the EASY way:
• *UPDATE* EASILY DualBoot Windows 10 ...
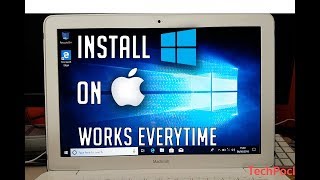
Hey guys! This is a tutorial on how to dualboot Windows 10 on an Apple Computer that is not supported to run Windows 10. Apple only allows computers from 2012 and newer to dualboot on a Windows 10 OS, and those that are older are only allowed to run Windows 7. Windows 7 and Windows 10 both have the same minimum system requirement, so that would mean any computer that can run Windows 7 can also run Windows 10, right? Exactly! Everyone wants the newest and the best, so why do those of us with older Macs have to suffer at the hand of Apple? Not anymore! By installing Windows 7 first, then upgrading Windows 10, we can end that suffering!
In this video, I will show you have to do just that and more! I will be using a 2009 Macbook Pro with an Intel Core 2 Duo. Just follow my stepbystep instructions. All Links are down below and feel free to comment with any problem or concern. I just ask that you be polite and kind, and I will be sure to try and get back to you as soon as I possibly can. Thanks!
**Disclaimer: I am not responsible for any damage done to your computer or hardware. This is something that you chose to do AT YOUR OWN RISK! So pay close attention to the details in the video and the description and you should be fine. Video for education purposes only.**
Step 1: Windows 7 – 00:35
So the first thing that we need to have is a copy of Windows 7. Because Apple only allows Windows 7 to be installed onto an unsupported mac, you need to go through windows 7 in order to get to Windows 10.
To skip this step, check out my other video: • *UPDATE* EASILY DualBoot Windows 10 ...
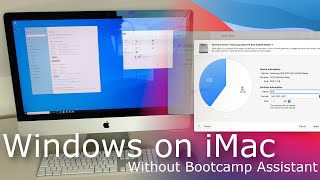
Step 2: Modify Bootcamp – 00:37
While the software is downloading, we can modify Bootcamp to allow our computer to create an install disk on our 8gb flash drive. Copy the app onto the desktop and then open the Info.plist in TextEdit. From there, delete ‘Pre’ from ‘PreUSBBootSupport’. Now Bootcamp can create a Windows 7 flash drive. Let the download finish before the next step.
Step 3: Backup Hard Drive and Create Windows 7 Install Flash Drive – 02:02
Now we make the bootable usb flash drive for Windows 7. Only select the first option in Bootcamp. We will get to those other two later. We also want to download the Apple Support for Bootcamp to run on the Windows side. Put that file on your bootable usb flash drive. Next, copy your personal files to the other, larger usb stick. This to make sure that no files are lost during the process, just in case something goes wrong. You may delete those files after the whole process through step 8 are completed.
Links:
• https://support.apple.com/kb/dl1635?l...
Step 4: Install Windows 7 – 03:51
Now we can create the partition and install windows 7 onto that. MAKE SURE you have enough space on the Windows side, because you cannot change it afterwards!
Step 5: Install Windows 10 using Media Creation Tool – 06:19
Now we can install Windows 10 through the Media Creation tool. Download it in the given link below. When it is all setup, some features like the volume and the brightness will not work because the function keys are different on a Mac keyboard compared to a Windows keyboard. But that’s for the next step.
Links:
• https://www.microsoft.com/engb/softw...
Step 6: Bootcamp Setup – 7:57
Download the Apple support file onto the Windows side and run it in compatibly mode. All the drivers should install automatically. Now you can choose the startup OS. The brightness, volume, and backlight keys should work now.
Step 7: Windows 10 Product Key – 10:06
Go into startup and go to settings. Click the ‘Activation’ ribbon to insert your own product key. The non activated Windows 10 is legally free but you will have limited options. To get the full version of windows 10, you will have to use your own product key.
Step 8: Coprocessor Driver – 10:25
The coprocessor will not have a driver. Therefore, you must install one yourself. Go to the Device Manager and right click the coprocessor with the error sign on it. Select ‘Update Driver’ and aim the troubleshooter at the apple support file. To do that, select the file with your Apple support file.
Music: Alta Looma Terrace by Wes Hutchinson
Check out my other videos and subscribe to my channel: / @rc_films_


![How To Bootcamp Install Windows 10 On An Unsupported Mac [New Version]](https://i.ytimg.com/vi/KJThhtD6ycs/mqdefault.jpg)