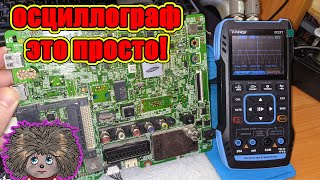
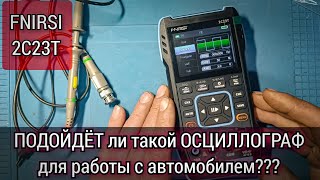
Dual-channel digital oscilloscope 2C23T FNIRSI + Signal generator + Digital multimeter. Details

The 2C23T batterypowered digital oscilloscopemultimeter from FNIRSI has a beautiful design and good electrical characteristics. This is a 2 channel digital oscilloscope, signal generator and multimeter. From the video you will learn how to use a 2channel oscilloscope, a generator and a multimeter. The oscilloscope has extensive settings and convenient controls. The generator can set 7 signal shapes with a frequency of up to 2 MHz, with precise adjustment of the duty cycle and amplitude. Like a multimeter, it measures current, voltage, resistance and capacitance, rings circuits, looks for phases and tests diodes.
Digital Oscilloscope | How to use an oscilloscope? | Digital multimeter
https://s.click.aliexpress.com/e/_ooc... OscilloscopeMultimeter 2C23T from the manufacturer
https://bit.ly/ElSanKan Subscribe but my ZEN channel
https://bit.ly/Pomkan Support the channel financially
• Цифровой мультиметр FNIRSI DMT99. Ка... DMT99 multimeter from FNIRSI
• Мультиметр с тепловизором 192*192. Ци... Digital multimeter with thermal imager
• Цифровой Осциллограф/Мультиметр/Генер... Oscilloscopemultimeter from GVDA.
• Лазерный дальномер FNIRSI IR40. Лазер... FNIRSI laser rangefinder
• Недорогой детектор скрытой проводки и... Metal and hidden wiring detector FNIRSI
00:00 Oscilloscopemultimeter 2C23T from FNIRSI. Short review.
00:54 Packing the device. Device characteristics.
01:26 Device passport. What is described in the passport?
01:44 Packing the device inside the box.
02:01 Oscilloscope cords included in the kit.
03:03 Other cords that are included with the device.
03:34 Charging cord. Power supply for charging.
04:06 Design of the device body.
04:28 Device display.
04:38 Device keyboard.
04:56 Multimeter inputs on the device.
05:06 Oscilloscope inputs and generator output on the device.
05:50 Reset the device if it freezes.
06:00 Folding stand and hole for hanging the device.
06:33 Dimensions of the device and its weight.
06:42 Turning on the device. Selecting the operating mode of the device.
07:14 Visibility of the color screen of the device.
07:32 Oscilloscope mode.
07:43 Displaying waveforms. Oscilloscope inputs.
07:56 Managing oscilloscope channels.
08:48 Functions of the AUTO button and the central joystick button.
09:24 Saving oscillograms into the device’s memory.
09:45 How to transfer waveforms to a computer?
10:07 Indicators that are displayed on the screen.
10:27 Adjusting the sweep frequency of the oscilloscope.
10:48 Operation of an oscilloscope with an internal generator.
11:11 Battery charge display.
11:21 Trigger label display.
11:29 Adjusting the signal span for each channel.
12:03 Voltages measured using an oscilloscope.
12:20 Displaying trigger settings.
12:31 Waveform labels for both channels.
12:53 Moving waveforms.
13:35 Forced activation of the oscilloscope mode.
13:45 Setting the trigger label.
14:05 Forced activation of generator mode.
14:14 Changing trigger settings.
14:44 Forced activation of the multimeter mode.
14:53 Configuring the display of additional parameters.
15:24 Frequency characteristics of the oscilloscope.
15:49 We switch to generator mode.
16:03 Generator waveforms. Signal range and frequency.
16:46 Setting up the signal shape and parameters.
17:16 Turning the generator on and off.
17:27 Connecting the oscilloscope to the generator.
17:57 Moving the waveform across the screen.
18:22 Trigger label switching.
18:38 Display of rectangular pulses.
19:01 Switch to multimeter mode.
19:15 Multimeter AUTO mode
19:40 Measuring battery voltage.
20:09 HOLD mode.
21:11 Measuring network voltage.
21:31 Resistance measurement.
21:41 Checking the LED.
21:57 Call mode.
22:10 Measuring capacity.
22:26 Finding the phase in the socket.
22:50 Temperature measurement.
23:18 Current measurement. Checking the battery.
24:06 Multimeter parameters.
24:23 Setting the menu language and volume.
24:40 Setting auto power off and screen brightness.
25:02 Selecting the default operating mode of the device.
25:24 The insides of the device.
25:40 Fuses inside the device.
26:11 My conclusions from the review of the device.
26:29 Support the video about the multimeter with a like and repost.
Channel Electronics for Beginners http://bit.ly/KANARD
Subscribe to this channel http://goo.gl/a6YJdO
I will help you promote your channel http://bit.ly/prodvizh
My books https://book24.ru/r/TvgMj
My social network account https://vk.com/iekimov
My email is [email protected]
The best videos "Do it yourself house" http://bit.ly/dom_sv_ruk
The best videos "Do it yourself electrics" http://bit.ly/el_sv_ruk
The best videos "Do it yourself plumbing" http://bit.ly/sant_sv_ruk
Best videos "Doityourself repair" https://bit.ly/RemSvRukPl
How to use an oscilloscope? | Digital Multimeter | Digital oscilloscope
#measurements #electrical #multimeter #oscilloscope


![[BRAND NEW] FNIRSI 2C23T ⭐ 2CH Oscilloscope + Multimeter + Function Generator ⭐ Wow!](https://i.ytimg.com/vi/U-rgURreOuk/mqdefault.jpg)


![[BRAND NEW] FNIRSI 2C53P ⭐ 2Ch 50Mhz Oscilloscope + Multimeter + Function Generator](https://i.ytimg.com/vi/rvHRBPjmsGY/mqdefault.jpg)