etrailer | Curt Spectrum Trailer Brake Controller Installation - 2021 Jeep Gladiator

Click for more info and reviews of this CURT Trailer Brake Controller:
https://www.etrailer.com/TrailerBrak...
https://www.etrailer.com
Don’t forget to subscribe!
/ etrailertv
Full transcript: https://www.etrailer.com/tvinstallc...
Hi there Jeep owners, Finn here 2021 Jeep Gladiator. We're gonna be taking a look at, and showing you how to install Curt's Spectrum Trailer Brake Controller. We've gone ahead and plugged into that test box which simulates a trailer. So that way it gets the proper loads, so we can actually get an output from it. When you've got one connected we can, we do have some adjustments here. So this first one here that you'll see when you first plug it in, it's probably gonna light up white like this.
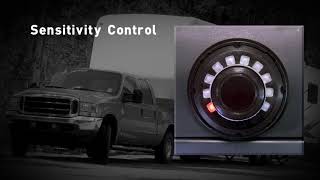
And as you turn the knob you see, it get brighter or dimmer, that's what this is, this is your brightness adjustment setting, when its all lit up white. So we're gonna go ahead and turn it nice and bright so that way it's easy to see. If we hit the button again, that's gonna cycle us to the next mode and this is gonna be our output mode, this is where it sends the voltage to the back to our trailer brakes. And this is where you kinda of get to choose how much that's gonna be, to see if you're getting 100 percent brakes, or if you're gonna get somewhere in between the less. If we hit the button again, it goes over to the sensitivity mode and this just effects on how aggressive the brakes are applied.
Whether they're kind of like eased on or more aggressive and you can adjust that here as well. You can see you're gonna get full aggressive on down when it's just on the little blue line there, it's minimum aggressiveness. So this, this is a nice setting for, usually used if you've got a trailer that's getting close to the weight of your vehicle, you can kind of bump up the sensitivity if you need to, to make it a little more aggressive to apply those brakes better, as necessary. And of course you want to adjust your output to make sure that you've got that set appropriately as well. We also have just the regular features that you get from a brake controller and that's you're manual slide.
It's not a full slide on this one, so you're not really gonna have an in between setting, but if we press and hold the button, that is our manual output. And it does have in between settings, you're just not going to get it on the fly like a manual slide, if you wanted to push it halfway, you could or whatever. With the, manual press there, it sets it to whatever you've got your setting at, so if we got it set all the way up to the top there for our output setting, when we hit the manual, it's gonna be a 100 percent. And if again, if we turn it down to something lower we're only gonna get lower there. There are a couple of switches on the module itself.
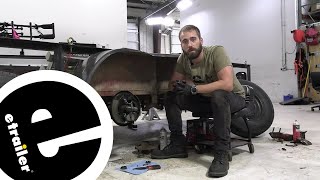
The little dip switches that you can change if you don't like it like that, you can change it to where the manual mode is gonna be at a 100 percent regardless of this, if that's something that you're interested in. The other switch, that's located on module there, will change it from its factory mode. So right now in factory mode, if we hit the button there, this is our manual output it also lights up the brake lights at the back. If you hit that other dip switch, on the module itself, you can make it so it doesn't light up your brake light to just puts an output to the trailer. This one you gotta be a little cautious with this setting cause under certain situations, depending on the state you're in and stuff like that, if you use the manual slide, it doesn't apply your brakes, you might not be DOD compliant. So, I prefer to just leave those settings the way they are, but it does have that option depending on the area you're at if you want to make those changes. We'll begin our installation here inside the vehicle, we need to determine where we're gonna install our Curt Spectrum and we also wanna locate and see if we have a factory connector that we can plug into, or if we're gonna need additional components. So first thing we're gonna do is figure out where we're going to place it. And it would be ideal you know, if it's in a location where you can easily access it, easily see it and where we can also hide our components. So, this panel right here in the front is actually a perfect candidate for all those things. So we're going to remove this panel here, just asses and see what's behind it to see if we can mount everything back there and where we're gonna put those. To remove this panel, it simply just pulls off start at the bottom edge. Pop it out, just work your way up. We'll do the same thing over on the other side, so we can get that out of the way. After removing it here we can take a close look at the backside of the panel. And it looks like a good mounting location, it's probably gonna be right below this. This area here,