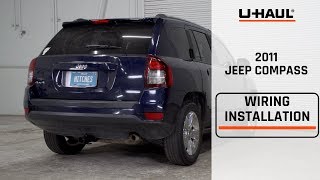
Step-By-Step Installation Tutorial for the Curt Trailer Hitch Receiver on a 2014 Jeep Compass

Click for more info and reviews of this CURT Trailer Hitch:
https://www.etrailer.com/TrailerHitc...
https://www.etrailer.com
Don’t forget to subscribe!
/ etrailertv
Full transcript: https://www.etrailer.com/tvinstallt...
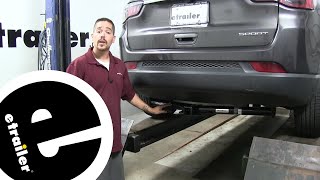
Rob: Rob 00:00:00 here at etrailer.com, and today you're going to be taking a look at the Curt Class III Custom Fit Trailer Hitch Receiver on our 2014 Jeep Compass. This is what our hitch is going to look like once we have it installed. It's got a really clean factory look to it because that crosstube is going to be hidden behind the bumper completely, and all we're going to see is that receiver tube sticking out. Since it's a Class III Hitch, it's going to give us a 2" x 2" receiver tube opening, so whether we're towing a trailer, hauling a bike rack or carrying a cargo carrier, we're going to have a really wide variety of options that we can use.The way we're going to mount any of our accessories is to the hitch pinhole here on the side. Our hitch is going to accept a standard 5/8 pin and clip. Now, these are not included in the kit, but you can pick them up here at etrailer.com along with some locking devices to make sure your accessories are secure.
Now, if you are planning on towing a trailer we're going to need a spot to hook up our safety chains. Our safety chains connection point is going to be at the bottom of the receiver tube welded on, and as you can see we'll have plenty of room to get most size hooks on or off. And the fact that the hitch pin is just slightly offset from the center means we're going to have less chance of our pin and clip or locking device interfering with our safety chains.Now, if you're looking for a hitch, obviously you're going to want to know how much it can handle. Our hitch is going to have a 400 pound tongue weight which will be the maximum downward force of the receiver tube. So we're going to be able to load up some of those larger cargo carriers or bike racks that have even up to four or five bikes on them.
As far as the gross trailer weight rating, our hitch is going to have a 4,000 pound rating on it. That's how much it can pull including the trailer and everything we have loaded on it, but you want to keep in mind you always want to double check your Jeep's owner's manual because you don't want to exceed the manufacturer's recommended weight.Like to give you a few measurements and that's going to help you whenever you're looking for accessories for your hitch like a ball mount, bike rack, or even a cargo carrier. From the center of the hitch pinholes to the outermost edge of the bumper, it's right about 5". That measurement's going to come in handy when you're looking at folding accessories to make sure you have enough room and that they're not going to come in contact with the rear bumper. From the ground to the inside top edge of the receiver tube opening is right about 133/4".
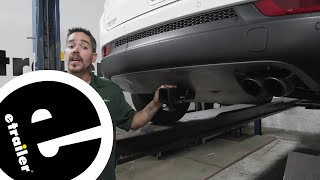
That measurement's also going to help you when you're looking for a ball mount to make sure you can match up the appropriate rise or drop for your trailer. Now that we've seen what our hitch looks like and we've gone over some of the features, let's put it on together.To begin our installation, you want to mark out the area that needs to be trimmed on the lower fascia, and we'll find that diagram in our instructions. We need to find the center point of our fascia, and the easiest way is if we come to these two fasteners, measure that distance, cut it in half, and that'll give us our center point. You're going to want to use a pair of tin snips or rotary tool, or you can use a razor knife. You just want to score it several times before you push too hard.I'm going to be using a rotary tool just to make a quick cut, so I can have nice clean lines also.
Keep in mind it is always better to cut smaller because we can always take more material away if the hitch doesn't fit but we can't add it back. With the fascia trimmed out, we're going to need to remove the four push pin fasteners that are on the very bottom. I'm going to grab a flathead screwdriver. You want to come underneath the center section of the push pin first, kind of pry it out and that's going to take a lot of the tension off. Once the center is popped out like this, we can come underneath the base, and we can pull the rest of the pushpin out. We'll do that for the other remaining three.We're going to need to lower down our muffler so we have a little bit more room, but before we do, I'm going to put a strap up to make sure it doesn't come down and cause any damage. Just put a little bit of tension on it, and if we move back towards the muffler, on each side we're going to have a rubber isolator on a hanger. We'll need to remove those. You can take a little bit of spray lubricant. We're going to spray them down. The main goal, we're going to take a pry bar, long screwdriver, whatever you have av