FAIL - How I Failed at Installing Stone Veneer EP 2

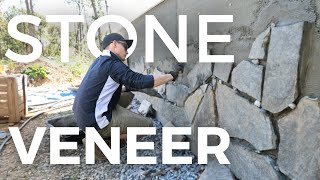
My first attempt installing stone veneer didn't go so well as shown here.
I tried to skip a major important step. What was that you may be thinking? Well, if you guessed the scratch coat then you are correct! Yup, I tried to skip the scratch coat, not because I'm lazy, not because I couldn't afford the extra mortar but rather because I simply thought my idea & way would work. It was just a shot & I still think it WOULD work if I were to use a wetter mortar batch & let the rows dry some before I stacked one on top of another. I believe if I used a natural stone with a live edge rather then a brick veneer I would have been successful no doubt!.
No big deal, it was just a shot in the dark, no regrets here. I'll tell you what though, it was 99 degrees this day with a high humidity so that alone sorta made it a miserable day & a long one at that.
Eventually I did succeed , you can see my accomplishment in the following video PART 3
or see the full build in timelapse here : • How To Install Stone Veneer TIME ...
To see the previous video before this one here is part one: • How I installed Stone / Brick Veneer ...
This is a video series about installing a wood burning stove & chimney. I needed to reduce the clearance to combustibles my epa rated stove required plus I wanted a nice cosmetic brick focal point behind the stove. I came up with a design that excited me & am executing the plan & taking you with me for the ride.......
I am not a pro masonry brick layer. I am a diy individual that enjoys working on projects of a broad variety. I like to try my hand on everything. Now that I have experience with stone veneer I feel like its easy enough & I want to do some more.......