Finishing 3D prints - Filling and sanding print lines for props

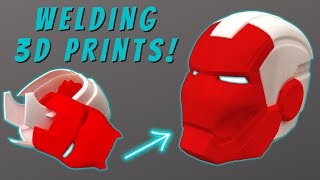
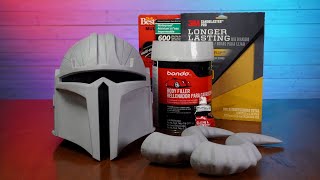
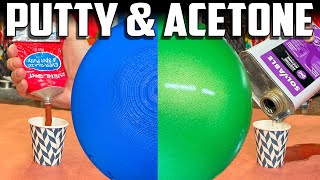
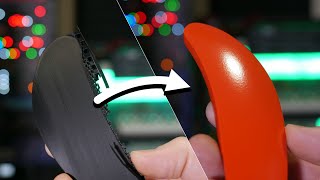
Filling 3D prints to remove the filament lines is essential to creating finished props. In this tutorial I talk about the process generally, and then show my favorite method using Bondo Glazing and Spot Putty thinned with acetone to rapidly apply fastdrying coats. I then sand the filler smooth, and move to using a final pass of Filler Primer, that gets wetsanded smooth. A final coat of primer reveals the smooth surface, ready for paint.
Important: Acetone melts ABS, so this will not work with ABS prints without likely destroying the print below. The prints in this video are all PLA.
Prints used in this tutorial:
Custom Mandalorian helmet "The Operator" by Alter Ego Armory, files found here: https://www.etsy.com/listing/16557339...
Print of the helmet purchased from Villainous Prop Shop: https://www.etsy.com/listing/16605987...
Custom Mandalorian Shoulder "SBMK2" by Alter Ego Armory, files found here:https://www.etsy.com/listing/12832421...
Print of the shoulder purchased from Villainous Prop Shop: https://www.etsy.com/listing/13048261...
Mandalorian Right Thigh: File by Great Ape Studio Art, print purchased from Clever3DStudio: https://www.etsy.com/listing/11252043...
Sanding sticks: https://www.amazon.com/gp/product/B00...
See some of my other weathering tutorial videos:
Part 1: Weathering Theory • Prop Weathering Tutorial Part 1: We...
Part 2: Acrylic Wash Weathering • Prop Weathering Tutorial Part 2: Ac...
Part 3: Chipped Paint Weathering • Prop Weathering Tutorial Part 3: Ch...
Part 4: Fuller's Earth Weathering • Prop Weathering Tutorial Part 4: Fu...
Part 5: Alcohol Ink Speckle Weathering • Prop Weathering 5: Alcoholbased Ink ...
Custom Costume Cases tutorials (part 14): • Customizing Costume Containers Part...
Follow more of my builds where I post them as I am doing them:
Instagram: / oddviking