Geosoft Oasis Montaj - How to Created 2D GMSYS

Geosoft Oasis Montaj How to Created 2D GMSYS
Creating a 2D grid model in Geosoft involves using the Geosoft Target software. Here are the general steps to create a 2D grid model in Geosoft:
1. **Import Data**: Import your geological or geophysical data into Geosoft. This data can include borehole information, geochemical data, geophysical survey data, or any other relevant spatial information.
2. **Create a New Project**: Open Geosoft and create a new project where you will work on creating your 2D grid model.
3. **Prepare Data**: Ensure that your imported data is properly formatted and organized for creating a 2D grid model. This may involve cleaning up data, establishing coordinate systems, and making sure all data sets are compatible.
4. **Interpolate Data**: Use Geosoft's interpolation tools to create a 2D grid model from your input data. Geosoft provides various interpolation methods such as kriging, IDW (Inverse Distance Weighted), or nearest neighbor interpolation.
5. **Adjust Parameters**: Set the appropriate parameters for the interpolation method you choose, such as search radius, variogram model, and cell size, to optimize the grid model creation process.
6. **Generate the Grid Model**: Once you've defined the parameters, generate the 2D grid model using the interpolation tools in Geosoft. This will create a continuous surface representation of your data.
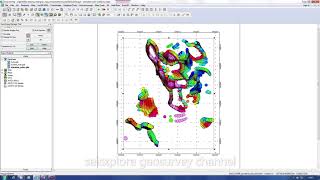
7. **Visualize and Analyze**: Visualize the generated 2D grid model in Geosoft to check for any inconsistencies or anomalies. You can further analyze the grid model by overlaying it with other data layers, applying filters, or performing statistical analysis.
8. **Export Results**: After you are satisfied with the 2D grid model, save and export the model in a format that can be used in other software or workflows.
9. **Quality Control**: Conduct quality control checks on the 2D grid model to ensure accuracy and reliability. Compare the grid model with the original data points to assess the interpolation performance and identify any potential errors.
10. **Model Validation**: Validate the 2D grid model by comparing it with independent data or known geologic features. This step helps ensure that the grid model accurately represents the subsurface conditions and geologic characteristics.
11. **Refinement and Iteration**: If necessary, refine the parameters or adjust the interpolation method to improve the quality of the grid model. Iterative refinement can help enhance the model's accuracy and ensure a more reliable representation of the underlying geology.
12. **Integration with Other Data**: Integrate the 2D grid model with other geological information or additional datasets to enhance the interpretation and analysis of the subsurface geology. Combining multiple data sources can provide a more comprehensive understanding of the geological setting.
13. **Documentation and Reporting**: Document the process of creating the 2D grid model, including input data sources, methodology, parameters, and validation results. Prepare a comprehensive report summarizing the findings and interpretations derived from the grid model for future reference and sharing with stakeholders.
By following these additional steps, you can further enhance the quality, reliability, and usability of the 2D grid model created in Geosoft.
#geology #physics #geosoft #science #earth #nature #quartz


![Pink Floyd The Dark Side Of The Moon (50th Anniversary) [2023 Remaster] {Full Album}](https://i.ytimg.com/vi/k9ynZnEBtvw/mqdefault.jpg)