Holiday Bowls with a Router | PLUS FREE TEMPLATES!

Make wooden bowls and dishes without a CNC! Plus, download free templates so you can make your own bowls.
It’s that time of year again. It’s when woodworkers scurry into their shop and make a bunch of wooden gifts for people because we’re too cheap to buy stuff from the store! I’m kidding of course. Everyone knows that we really give wooden gifts because they’re fun to create and we can make them as unique as we want. Plus, it never hurts to use up some of that scrap wood that’s laying about the shop.
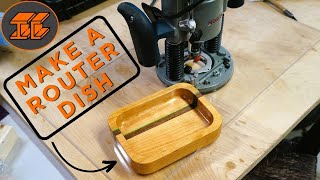
Today’s project is how to make wooden bowls with the router. I really like making these. I’ve done several for family members in the past, but I haven’t made any Christmas themed ones. To start, I made a few printable templates. Feel free to download these for free and make your bowls at home!
FREE TEMPLATES!! https://newtonmakes.com'>https://newtonmakes.com/shop'>https://newtonmakes.com'>https://newtonmakes.com/shop
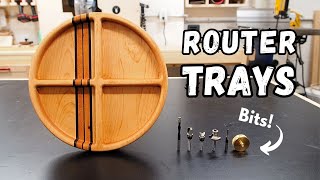
Routing out bowls is messy work so I urge you to wear safety glasses and a respirator. I’m using a 3/4” diameter bowl bit in my router. It has a bearing at the top so it rides along the template. As you route further down into the bowl, the bearing will begin riding on the interior face of the bowl. You don’t have to use one of these bits. You could use a spiral or straight bit. Instead of having a curved bottom your bowl will have sharp interior edges. I made a bunch of passes with the router. I don’t like to take too much material off at a time. I kept routing until I had a bowl bottom that was about 1/4” thick.
After the bowl was routed out completely, I used a compass to draw a border about 3/8” around the entire bowl. You could also have spray glued the downloaded template directly on your workpiece before routing and then cut along the lines on the template. Either way works. Using a thin blade at the bandsaw I cut out the exterior of the bowl. Then I did a whole bunch of sanding on the outside and inside. If you plan to make a ton of these, then you may want to make a template that lets you use a flush trim bit around the outside too.
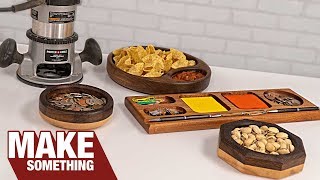
Once the bowl was sanded, I applied a hardwax finish. I’m starting to use these finishes on more projects. I like the look they provide and they are really easy to apply. I love how my bowls turned out. If you give this project a try let me know how it turned out in the comments below!
•• About NewtonMakes••
I’m Billy and I make fun things. Sometimes, it’s something I need like tool storage ideas. Other times it’s silly or nerdy stuff that I want to build. If you want to get ideas for making stuff, or just want to watch something entertaining then make sure you subscribe.
•• My Links ••
Patreon: / newtonmakes
Website: https://newtonmakes.com'>https://newtonmakes.com
Instagram: / newtonmakes
Facebook: / newtonmakes
Here’s a list of tools and materials that I used to make this project. As an Amazon Associate I earn from qualifying purchases.
•• Tools & Materials ••
Dewalt planer: https://amzn.to/38LarPW
Jet 8” Jointer: https://amzn.to/310uabK
Rikon 14" Bandsaw https://amzn.to/3168ElS
Jet Drill Press: https://amzn.to/36yRj5U
Forstner bits: https://amzn.to/35U8CSa
Brass Setup Bars: https://amzn.to/37yyAZK
Spindle sander: https://amzn.to/2CxDCvq
Titebond Quick & Thick: https://amzn.to/2U0SGrc
Spray adhesive: https://amzn.to/335oXRS
Bosch Router: https://amzn.to/30Yus2A
Bowl router bit: https://amzn.to/3kUbGSg
Osmo Top Oil: https://amzn.to/2xQG2SW
Dust mask: https://amzn.to/2O4x3Tx
Eye protection: https://amzn.to/37F5M1N
Hearing Protection: https://amzn.to/31JRpHa
•• My Links ••
My Amazon Store: https://www.amazon.com/shop/newtonmakes
Website: https://newtonmakes.com'>https://newtonmakes.com
Instagram: / newtonmakes
Facebook: / newtonmakes
Esty: https://www.etsy.com/shop/GenWoodworker