How to Flame Weed - The Beginner's Guide

Welcome to my channel, Homes for Beginners where I show you how to do repairs around the house yourself. Please don't forget to hit that LIKE button and SUBSCRIBE for future videos.
In this video I will be showing you how to properly flame weed. I will be going over the benefits in a moment, but first I will start with the safety and operation of the torch used for this. This is a propane torch that connects to 20lbs propane tank such as what is used on a BBQ. The end of the torch where the flame is will become very hot. This is an area you do not want to touch when the torch is off, you’ll need to allow it to cool off before it’s put away. The supply pipe goes back to the control valve, you can hold onto the valve base or the pipe as both of these areas stay cool. The hose connects the wand to the tank, always make sure it’s in good condition & no damage is present. The fitting which connects to the tank is a lefthand thread. Make sure the valve is closed on the torch, then connect the line. Being that this is a lefthand thread, to tighten it, you’ll need to turn it counterclockwise.
Amazon links for various products used in the video for both USA and Canada:
USA
Large propane torch: https://amzn.to/3jnAx1V
Small propane torch: https://amzn.to/2Lu4JvK
Flint striker: https://amzn.to/3a01GoF
Canada
Large propane torch: https://amzn.to/3ruKa1G
Small propane torch: https://amzn.to/3jnkFMV
Flint striker: https://amzn.to/3cMps98
Open the valve slowly & you should see the hose move as it builds up with pressure. You can use a spray bottle with a soap & water mix to inspect for any leaks on any connections. Once the pressure builds up for a moment, then open up the valve on the tank fully. Once the pressure is build up in the line & the tank valve is fully opened, only open the valve a small amount on the torch, then using a torch striker, light the propane.
The flame size can be adjusted by the valve on the torch, the bigger the flame, the hotter it’ll be. However with a bigger flame, the quicker the supply of propane will be used up.
To shut off the flame, it can be turned off by the torch valve, but if you’re done with the torch, what I prefer to do is burn off the gas in the line by turning off the tank first. Allow the flame to get extremely small, then turn off the torch valve & disconnect the line.
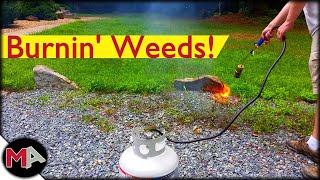
This can be used in large areas such as on sand, soil, clay, & even on paving stones, gravel, etc. When the torch is on, adjust the flame to your preference, hold the end about 4” away from the ground at an angle, the distance will depend on how the flame is set. This method can be used on both weeds & grass, it’s best to do this on days after a recent rain where the ground isn’t excessively dry as this can be a fire hazard. Have a watering can, hose, or fire extinguisher close by just as a safety precaution.
I work in an outward direction, pushing the flame forward. Always keep the flame away from the hose & tank. This is a great natural way of controlling weeds, you don’t have to deal with any harsh chemicals & it’s a common method used in organic farming. The flame only needs to be held for less than a second over the weed to kill the aboveground portion of the weed. You should nice the leaves of the plant change color & finish.
I prefer to burn the top portion of the plant fully, this heats the ground enough where a shallow root system becomes damaged as well. It’s best to do this when the plants are still young as the root system won’t be as big, therefore they’re easier to burn. With only the top portion of the plant damaged & not completely burned, this does have the potential of killing the root system as the leaves aren’t able to absorb light to form develop the plant, this is called photosynthesis. Depending on the vegetation you’re burning & what quality of burn is done, this will affect how quickly plants grow back. This torch is rated for up to 500,000 btu which makes working over a large area somewhat quick. A 10' by 10' area usually takes about 10 minutes.
If you are working around areas such as trees, shrubs, or even grass such as here. Water can be applied to the vegetation you don’t want damaged, keep in mind that heat does travel upward, so it can damage anything above the flame area. The torch can be set to a lower setting, then direct the torch away from the area you don’t want damaged, & follow through with pushing it away.
For spot burning, using a small handheld torch that screwed onto a tank would be my preferred method. With the torch, this has a righthanded thread. Open the valve to a low setting, then using the striker, ignite the flame. This will have more of a concentrated flame that works great on individual plants & can achieve up to 1000 °C or about 1800 °F.
© Homes for Beginners 2019
All Rights Reserved
No part of this video or any of its contents may be reproduced, copied, modified or adapted, without the prior written consent of the author.