How To Install an Exit Sign by a Professional Electrician

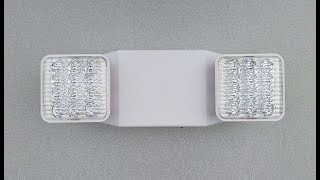
An Exit Light Company Electrician demonstrates the process of installing an LED Exit Sign. In this demonstration we use the COMBOG2 (https://www.exitlightco.com/product/C...) Combination Exit Sign / Emergency Light Unit.
Full Instructions at : https://www.exitlightco.com/howtoin...
Shop Exit Signs : https://www.exitlightco.com/category/...
Shop Emergency Lights : https://www.exitlightco.com/category/...
Installation Steps From This Video:
1) Remove the front faceplate
2) Pop out the mounting canopy knockouts on either the top or the side of unit
3) Attach the mounting canopy
4) Attach the metal grid to the mounting canopy with included screws using the configuration of the junction box
5) Feed the input wires through the mounting canopy
6) If the exit sign housing is metal, wire and cap the green ground wire to the corresponding ground wire in junction box (plastic housing exits will have no ground wire)
7) Place the white common (neutral) wires together and cap them with a wire nut (included)
8) Wire and cap either the 120V (black) or 277V (red/orange) wire with the line input wire (depending on the decided voltage)
9) Cap off the remaining wire that was not used
10) Fasten the mounting canopy to the junction box with the included screws leaving all installation wiring inside the junction box
12) Connect the battery to the circuit board
13) Reattach the front faceplate
Background music from : https://www.bensound.com/