How To Properly Prepare u0026 Re-Caulk a Teak Deck Seam Part 2

In Part One, we went over in detail how to professionally and properly prepare your caulk seams. Today we are filling those seams with caulking but not just with any caulking, but with Teak Decking systems SIS 440 Before we get started, I'd like to share a little bit about our caulking and why it’s so wellknown and respected around the world. Our caulking story starts with nearly 40 years of deck building. We first started out using the industry's leading caulking and well, to say the least, we were not getting the results we wanted. So we knew what we had to do. We embark on a journey to develop our own caulking one that met our high standards. We knew we wanted it to be flexible so that as your boat deck moves so does the caulking and you don't get that separation in the seam. We wanted it to be both UV and chemical resistance so that the powerful rays of the sun didn’t destroy it, and we wanted to have minimal shrinkage so you didn’t get the low seam thing. But overall, we wanted it to be easy to work with. Unlike some of these twopart systems that require primer. After many trials we are able to develop a product that's now known as the professional’s choice. This product which was solely designed for the production of our own teak decks is now used by boat manufactures deck builder’s and boat yards around the globe.
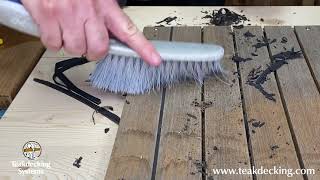
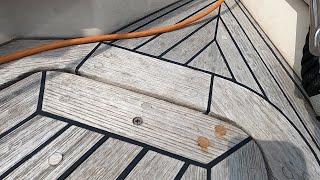
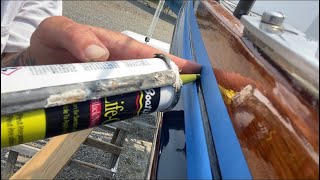
For small job and repairs you can use a manual cartridge. For larger jobs you can use the sausage gun. Today we are using an airoperated pneumatic air gun. The first thing to do is to cut the tip of the cartridge at about a 45° angle. Next, you want to puncture the foil seal with a poker. If the foil does not get fully open could have a mess. Next, using a pair of pliers, pinched the tip of the nozzle so that it fits better into the scene. Our sample panel has two versions. One is taped and the others untapped. The purpose of the tape is to minimize standing but is only recommended for smaller areas. Larger projects are to be done with no tape and fully sanded afterwards. Pay close attention as Rocky pulls the tip of the cartridge back is making sure that the caulk is crowning up behind the nozzle. This is to ensure that the caulking is getting all way to the bottom of the sea. Once the seams are filled. Rocky will now take a flexible putty knife to push the caulking further into the seams. This is referred to as “spooning” or “tooling”. He now returns the opposite way to remove any excess caulking. This will reduce sanding later. For the tape version, you can either remove the tape immediately or you need to wait until the caulking is completely cured. The panel must set for a period of time, typically 3 to 5 days depending on the climate. Sanding any sooner will disrupt the curing process. We are now ready to sand. Start with 36 grit sand paper and finish with 80 grit.
For more information on Teakdecking Systems products included in this video, please visit
https://www.teakdecking.com/deckingp...
#teak #teakdeck #teakdecks #teakdecking #teakdeckingsystems #teakwood #marinedecking #yachtdeck #boatdeck #maintenance #repair #sis440 #caulking #sis440caulk #sis440caulking #boatcaulk #boatcaulking #sarasotaflorida #teakwood #teakdeckingsystemsyoutube