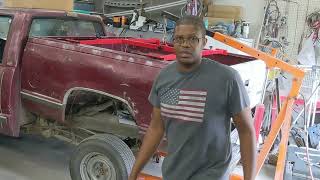
How to Remove a Truck Bed Alone - DIY Guide for Solo Enthusiasts

If you're looking to remove your truck bed or cab without the help of others, this video is for you! I show you how to build a sturdy and reliable removal tool using common materials and tools. I also provide a detailed guide on how to assemble the tool and use it to remove the bed from an old chassis. You'll also see how I check the fit and alignment of the bed on a new chassis. Subscribe to my channel for more DIY automotive content.
Materials:
2" x 2" x 4' steel tube with .120" wall thickness
Four pieces of 1 5/16" x 1 5/16" x 2' steel tube with .120" wall thickness
Two pieces of 2" x 2" x 3/16" plate steel
One piece of 4" x 4" x 3/16" plate steel
Two pieces of triangleshaped plate steel measuring 6" wide x 3" tall and with 3/16" thickness
Two bolts, either 3/8" or M10 in size
Instructions:
Step 1: Prepare the Plate Steel
Drill a hole in the center of one of the 2" x 2" x 3/16" plate steel pieces and tap it to fit the bolts you are using (3/8" or M10).
Drill a hole in the triangleshaped plate steel, about 1.5" down from the top of the triangle, using a 5/8" drill bit.
Note: Hole placement may vary based on the engine hoist you plan to use.
Step 2: Determine Hoist Location
Mark the center of the 2" x 2" x 4' steel tube.
Tack the 4" x 4" x 3/16" plate steel to the center of the 2" x 2" x 4' steel tube.
Center and tack the two 6" wide x 3" tall triangleshaped plate steel pieces above the edges of the 4" x 4" plate steel, running parallel to the square stock. Ensure that there is enough room for your engine hoist to fit between these plates. If not, readjust until it fits.
Once you have the engine hoist in place, weld the triangleshaped plate steel to the square base.
Finally, weld the square base to the square stock.
Step 3: Install Set Screws
Place the 2" x 2" plate steel flush at both ends of the 2" x 2" x 4' square stock, and mark the center of the tapped hole on the square stock. This should be on the same plane as your hoist location.
Drill a hole larger than the bolt into the top of the square stock.
Place the 2" x 2" plate steel flush at both ends of the square stock and tack it into place, then do the final weld.
Thread in the bolts a few turns.
Step 4: Build Extendable Arms
Mark the center of the remaining smaller square stock both lengthwise and widthwise.
Place the two pieces of smaller square stock in a "T" shape, lining up the center points and tack them. Note that one piece should be on top of the other.
Repeat for the other side.
Do the final weld.
Insert the extendable arms into the larger square stock. The perpendicular pieces of square stock on the arms should be on the same plane as the engine hoist location and set screws.
If you have any questions feel free to leave a comment and I will do my best to better describe!