How to Remove and Install Hose Clamps Single or Doubled Eared Crimp Style

Welcome to my channel, Homes for Beginners where I show you how to do repairs around the house yourself. Please don't forget to hit that LIKE button and SUBSCRIBE for future videos.
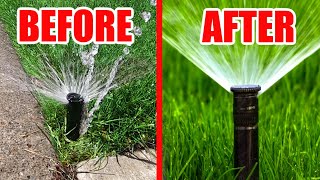
In this video, I will be showing you how to remove and install single or double eared clamps. These clamps can be found on a variety of applications such as small engines, plumbing, vehicles, axles, driveshafts, and in this example if a gaspowered sprayer.
Amazon links for various products used in the video for both USA and Canada:
USA
Ear clamp pliers: https://amzn.to/3aFeuzM
Single ear clamps: https://amzn.to/2OeCqT2
Double ear clamps: https://amzn.to/39URnC4
Canada
Ear clamp pliers: https://amzn.to/36PnmSi
Single ear clamps: https://amzn.to/2N67Xpq
Double ear clamps: https://amzn.to/2Z5gKLr
I will be proving a few different examples on the removal, so you can pick whichever method works for you depending on what tools you have available. And I’ll even touch on what the possible risks are of each method.
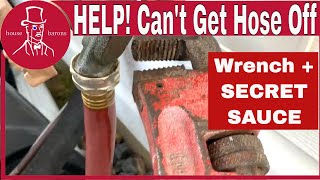
First is using a standard screwdriver. While I’m not typically a fan using a standard screwdriver as a pry tool, yes it can get the job done. However I would be extremely careful here, this should only be used on connections that won’t break, such as the steel hose barb here. If this was used on a plastictype fitting, there is a good chance you’ll break it. Find the appropriate size screwdriver, force it into the crimped ears and slowly pry it open.
Another risk is having the screwdriver slip, this can result in harm to yourself or damaging surrounding components. So take extreme caution when using this method. Once done, the clamp can be slide down and the hose can be removed.
Next is using a rotary, for this, I have a small cutting disk to cut the clamp. This does create heat and sparks, so it’s not something I’d recommend using on fuel line or fuel venting connections as there is a risk of a fire. I’m also cutting the clamp off the ear, so any material from cutting isn’t embedded in the plastic.
Once the clamp is cut, it can then be spread and pushed off the connection. Then the hose can be removed.
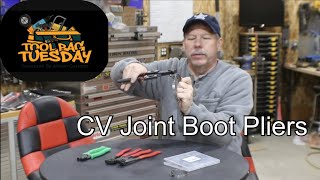
The method I prefer, however, is does require an additional tool. There are pliers specifically designed for removing and installing these clamps, they have jaws specially designed to cut the clamp. Side or bullnose cutters can even be used to cut the clamps, but they don’t always have a rigid frame or enough leverage for cutting.
After that, you can spread the clamp and remove it. Then remove the hose off the connection.
For reinstallation, here I have the new replacement hose. As a tip for cutting hose, if you work with hose quite often, I’d recommend getting a hose cutter such as this. It’s able to keep the hose somewhat round in the jaw and can provide a clean square cut. The blade can be removed for sharpening as well. Cut the hose to the appropriate length first.
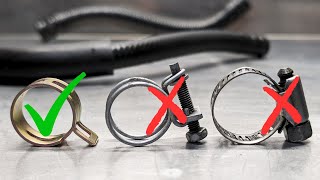
Next is installing the new eared clamp. These are available in with one or two ears and nickelplated or stainless steel. The double eared clamps tend to have more range inside when clamping, pick the correct size for the project you’re working with.
Make sure you install the clamp first before installing the hose.
Depending on your project, you can use a light amount of rubber safe silicone spray so the hose slides onto the barb easier.
Next using the specialty pliers, crimp the ears. With this being a double eared clamp, if you’re working in a tight space, crimp the one so the clamp is still able to spin. Rotate the eared clamp around, then get the opposite ear, this will ensure you have a tight connection.
A closeup view. These clamps are used as they can have a lower profile than compared to a gear clamps, can’t be tampered with as easily, and provide a tight clamp to ensure there are no leaks.
Just to give you a close up of the specialty pliers used here. These are made by Knipex and are more expensive than some of the other versions I’ve seen online. However, they got have a rigid robust design. There are two jaws used for clamping and cutting at different angles to work in a variety of situations.
As mentioned earlier, of course, you can use bullnose cutters for both removal and installation. However, this may be a bit harder on the jaws depending on the design of your pliers.
And now with side cutters, you’ll most likely need a heavier pair for such a task. These too can be used for cutting and installing. If using bullnose or side cutters, you may damage the cutting edge so be mindful of that too.
© Homes for Beginners 2019
All Rights Reserved
No part of this video or any of its contents may be reproduced, copied, modified or adapted, without the prior written consent of the author.