How To Remove Moisture From Your Compressed Air

Parts that I used for my setup:
Transmission cooler: https://amzn.to/2tvqGhF
Brass flare nuts: https://amzn.to/2MZBWey
Brass flare fittings: https://amzn.to/2lAc9wE
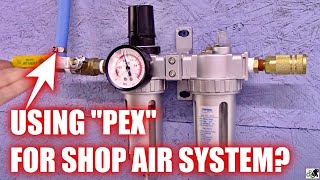
Water separator (auto drains when the trap is full): https://amzn.to/2KiVmJj
Water separator (only drains when the compressor shuts off and the line unloads): https://amzn.to/2MnqfOQ Good for low duty cycles
Water Seperator that I used: https://amzn.to/2IAxzYo (not cheap or easy to get)
Flare tool: https://amzn.to/2MnJGWB
Cooler Mounts: https://amzn.to/2Lg55zH
Tubing: https://amzn.to/2VSYUIE
Help support the channel by using my Amazon links.
As an Amazon Associate I earn from qualifying purchases and your cost is exactly the same.
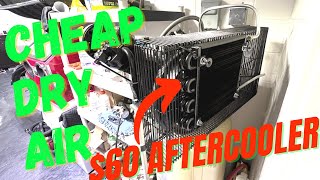
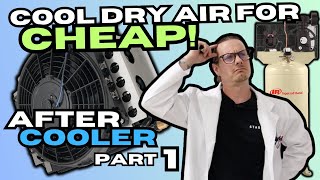
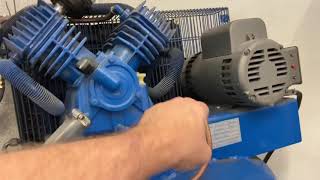
In this video I show you how to build your own compressor aftercooler and cooling coil using copper pipe. The aftercooler will greatly reduce the moisture in your tank and air system. The benefits of reducing moisture in your compressed air are:
The aftercooler works far better than the cooling coil. If I had to choose one to use I would use the aftercooler. The tank will last much longer if your compressor has an aftercooler. A lot of higher end air compressors come with them as a factory option. They can be added yourself for far cheaper. Both the cooling coil and the aftercooler work on the same principle. When air is cooled any water vapor is condenced back into water. A properly working dryer system will trap this water an keep it out of the air system.
Questions? Shoot me an email at [email protected]
Disclaimer:
The information, demonstration and any content contained in this video is for informational purposes only. The user Repair Geek makes no warranty, express or implied, regarding the effectiveness or safety of the contents of this video. In no way should the contents of the video, including the tools used, be repeated or tried by anyone. Viewers should only seek the help of a trained professional located at a licensed auto repair shop for any fix, modification, alteration, or any change to their vehicle. Repair Geek shall not be liable for any injury, damage, or loss to any person or property that may result from use of the tools, equipment, or any content contained in this video. In addition, there is no way to guarantee that the video is not altered or modified or is not in the final form submitted by Repair Geek and therefore, Repair Geek does not warrant that the video is unaltered or not modified. The links on this video to products are for informational purposes only and in no way are an endorsement of the safety or effectiveness of the particular product. Viewers understand that anything contained in this video or linked to or from this video is the sole responsibility of the viewer and in no way provides an express or implied warranty as to the safety or effectiveness of any linked tool, product, or video. Therefore, viewer agrees to release, waive, and discharge Repair Geek or anyone affiliated with Repair Geek, from any and all liability, claims, demands, actions, and causes of action whatsoever arising out of or related to any loss, damage, or injury, including death, that may be sustained by the viewer, or to any property belonging to viewer, regardless of whether the loss is linked to the use of the contents of this video, or otherwise and regardless of whether such liability arises in tort, contract, strict liability, or otherwise, to the fullest extent allowed by law.