How to: Replace a Spider Gasket on a Multiport Valve

What Is A Spider Gasket Blog http://bit.ly/2GvKEPG
How To Maintain and Repair Your Multiport Valve HTG http://bit.ly/2RwwqnL
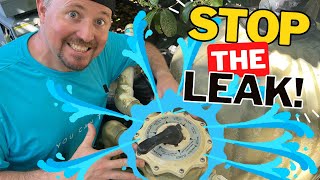
Why Is My Multiport Valve Leaking Blog http://bit.ly/37Aidfg
How a Multiport Valve Operates HTG http://bit.ly/2GBch9H
Clear Silicone RTV http://bit.ly/37BgyG3
Magic Lube Oring Lubricant http://bit.ly/2Gve1l1
SUBSCRIBE for FREE swimming pool care and maintenance videos
every week: http://bit.ly/SubscribeINYO ****
VISIT our blog for weekly swimming pool tips, tricks, and more! http://www.inyopools.com/blog
SHOP at our online store! http://bit.ly/InyoPools
Listen to the Poolside Chat podcast!
iTunes:http://bit.ly/PoolsideChat
SoundCloud: / inyopoolscom
LIKE us on FACEBOOK! / inyopools
FOLLOW us on TWITTER! / inyopools
FOLLOW us on INSTAGRAM! / inyopools
JOIN our circle on GOOGLE+ https://plus.google.com/+Inyopools/posts
To view this guide on our website, visit:
http://bit.ly/2Rx2JD2
This video will be showing you how to replace the Spider Gasket on your Multiport Valve. This fix is common and something you may have to do a couple times over a life of a valve. The usual symptom of a bad spider gasket is water diverted into your waste port even though the valve is set to regular filtering mode. This is caused by a warping or tearing of this gasket causing an improper seal. It is a moderately easy fix so let's get started.
For this operation you'll need a screwdriver, pliers, and Oring lube(Loctite Glue
For some Gaskets will be necessary).
Before we start, please remember to turn off all power to your pump, or else this
simple task can turn into a gusher. Also use an air relief valve to relieve any pressure inside the tank before removing the valve lid.
First we'll need to set the valve into Winterization" mode. This lifts the diverter from the valve bod, making it easier to work withy.
Now we can remove the bolts and nuts connecting the lid to the body of the valve. Make
sure you keep track of these and store them in a safe place until we put the lid back on.
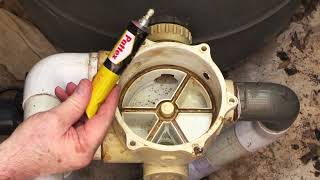
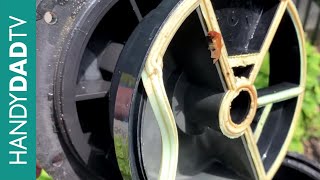
Spider gaskets can be either molded into the body of the valve or the wheel like diverter. Whichever side it's on, the operation is pretty much the same for removal. Use your fingers or some needle nose plier to remove the worn Oring.
Clean any foreign material from the gasket's groove. This can be dirt, oil, glue, or
lube residue; this ensures that when we install the new gasket, it is sitting cleanly in place.
This next step is only for valves that require the gasket glued in. using Loctite 401, 403, or 416 apply a sparing amount of glue. The glue lines must be continuous and intersect at the intersections of the grooves, and only on the bottom of the gasket.
At this point we apply the new gasket. Press the new gasket firmly into place. Run your
fingers along the outline to find any bumps or points of concern. Address these unsmooth areas to ensure the gasket is properly seated.
With the gasket secure, we can assemble the valve. Place the valve's lid on top of its
body. Where the two pieces meet you'll notice notch or a tab on both sides. Align these two tabs. This is a guide added by the manufacturer to ensure the lid is installed correctly.
Depress the valve handle and rotate it to the closest standard position (FILTER or RINSE), being careful not to rub the plug on the new gasket. Release the handle, allowing the plug to hold the gasket in place while curing.