How to Replace the PCV Diaphragm on a Volvo T5 [Money Saving Way]

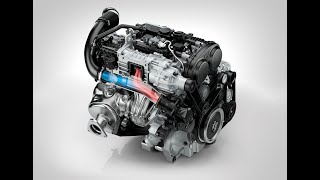
How to replace the positive crankcase ventilation, or for short pcv diaphragm on your Volvo T5 engine. The car I’m working with is a 2007 Volvo C30 T5, the T5 engine depending on the model does come with a couple different styles of PCV systems. This engine has the heated PCV system and it comes as an assembly with the oil filter housing which is about $300 from the dealer. The other style is basically a plastic box which includes an oil trap instead and is about a quarter of the price. There is only one source on Ebay who makes a new diaphragm, everyone else only sells a filter housing replacement. The new diaphragm was about $10 and the fastest shipping method was about $50 to Canada. #volvo #volvot5 #volvoc30
Eventually with heat and age, the rubber diaphragm will crack and break. When this happens, the car will make a howling sounds, almost as if you have a faulty idler pulley bearing. However the sound only happens at idle. When this happens, you can drive the vehicle but not for long. It’ll cause excessive vacuum in the engine, if driving the vehicle for an extended period of time, it will cause damage to your camshaft and crankshaft seals. Another way to tell if the diaphragm has failed is by pulling up the dipstick or open the oil fill cap in the valve cover. You’ll notice a strong vacuum. When those areas are open, the sound will also disappear. I have also found the sound is much quieter when the engine is colder vs when it’s up to operating temperature. The turbo will also not stay in boost and if driven long enough, a check engine light will be triggered which maybe a P2187 which means the engine is running lean at idle.
Website: http://4diyers.com
Patreon: / 4diyers
Facebook: / 4diyers
Google Plus: https://plus.google.com/+4DIYers
Twitter: / 4diyers
Instagram: / 4diyers
Tumblr: / 4diyers
Pintrest: / 4diyers
Tools/Supplies Needed:
standard screwdriver
OBD2 code reader
new diaphragm
socket set with ratchet
flashlight
Procedure:
ensure your engine is cold when working on it
start by removing the air duct going to the air box by removing the two 8mm bolts on the radiator support
pull up the first portion of the duct to unclip it and then remove the lower portion
there is another round cap that needs to be removed
this is removing by using a small pry tool or a standard screwdriver can also work, either push the tool between the cap and the plastic edging or pull the cap up by the little notch in the plastic edging
once that cap is popped up, you can work it around to unclip it from the backside
the diaphragm will most likely come out with the cap and there will be a spring left inside the assembly
then remove the spring
clean the cap and inside of the pcv valve area to remove any oil residue or build up
pull the diaphragm from the cap and now you can see the split which was causing the issues
ensure the spring is clean before reinstalling
install the spring
the position of the new diaphragm, the black plastic ring faces down and the spring sits inside the recessed area
getting this back together can be quite tricky
considering it’s such a tight space with minimal room to work and you can’t get a clear view
you may need to feel around to some extent, from what I’ve found, install the spring and diaphragm together, the spring must be compressed and then release it when it’s above the hole on it’s alignment tab
you can push the diaphragm down with a long screwdriver from the top between the intake runners, then slowly work the cap into place
try to snap the cap on the rear first, then finish up with the wrong
the long screwdriver can be used for added leverage to pop the cap down as it’s a tight connection
starting the engine to verify the repair is successful
as a final step, the check engine light should be cleared
Thank you to all those who watch my videos and support my content. Don't forget to subscribe to my channel for future tutorial videos and like my video if you found it helpful. New videos are always being uploaded every week!
© 4DIYers 2013
All Rights Reserved
No part of this video or any of its contents may be reproduced, copied, modified or adapted, without the prior written consent of the author.