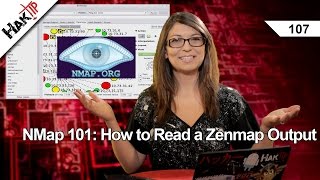
NMap 101: The Zenmap Interface HakTip 106

Hak5 Cyber Security Education, Inspiration, News & Community since 2005:
____________________________________________
Today Shannon goes over Zenmap, the graphical user interface version of NMap.
Today we're checking out Zenmap!
Zenmap is the graphical user interface version of NMap, that's available for Mac, Windows, and Linux. It is free and basically just takes all those commands we've learned up til now, and sticks them in an easy to use frontend that anyone can learn.
Installations for Zenmap and walkthroughs can be found on nmap.org. Today, I'll walk you through some of the simple steps to get Zenmap working on your Linux computer. First off if it isn't installed yet, use sudo aptget install zenmap to install it. Once installed, type sudo zenmap to open the GUI.
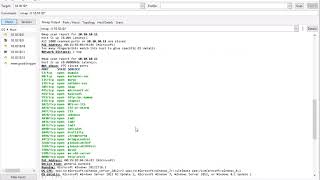
Up at the top you'll see a line for the target. This is where you'll type in your target's ip address, such as: 10.73.31.74. As you type your target, you'll see the command line change. This is what the command would look like in your terminal, and it should look awful familiar at this point. Under profile, you can choose your type of scan you want to use. Some of these include: a regular scan (which just does the default scan through nmap), a Ping scan (which will scan to discover which hosts are up and running), and several versions of an intense scan (which will quickly scan, with version detection, give you a verbose output, and do an ICMP echo ping).
Each time you change something in the Target or Profile lines, the command will change. Once you hit scan, your scan will commence and you'll get an output very similar to what you see in the terminal. Under hosts, you see a listing of all the IP addresses on your network that you've just scanned.
Now lets get to customizing. Say you want to do a scan that isn't found under the "Profile" list. You can create a new one by going to Profile: New. A lot of these different options should look familiar to you as well, so you can click through the different tabs and choose your options, and Zenmap will automatically create a command for you, and when you hit save, it'll be available in the Profile list. Luckily, all of the options listed also have help info on the right side, so if you get confused or forgot what something means, just check there!
Now, you can run that new command you just created and you'll end up with an output just like what you'd get in the terminal. Cool!
Now that you know how to create your own profiles and do a little bit of customization, your mission is to have some fun with Zenmap and discover what all the fuss is about! Next week, I'll take a look at Zenmaps output options, and some feedback from you.
If there's anything you want me to check out regarding NMap before we end our series, let me know. Send me a comment below or email us at [email protected]. And be sure to check out our sister show, Hak5 for more great stuff just like this. I'll be there, reminding you to trust your technolust.
~~~~~~~~~
Please watch: "Bash Bunny Primer Hak5 2225"
• Bash Bunny Primer Hak5 2225
~~~~~~~~~
____________________________________________
Founded in 2005, Hak5's mission is to advance the InfoSec industry. We do this through our award winning educational podcasts, leading pentest gear, and inclusive community – where all hackers belong.