RPD Ultimate Juicing guide - Best Loops with Examples (No Perks Since 2020)
My Live Streams / mr_tatorhead
Huge Shoutout to YaboiMLT for helping me make these guides / yaboimlt
This should help anyone trying to get the outbreak breakout achievement in dbd.
RPD is known to be a killer sided map, but once you know how to run it, it is a survivor sided map on a timer becoming more killer sided as the trial progresses. For this reason it is important to get the middle gens done, before doing outer gens on the map. The failure to do this is why I believe both of these maps have such a high kill rate.
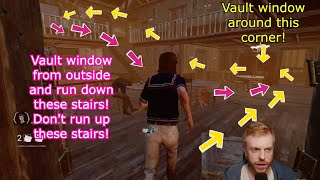
The middle area (escalators) is the key to the whole map. The gens that are important to get done are also located in this main room, making it even more appealing to get these gens done first. Run the Escalators and break off according to how close the killer is, there are anywhere from 59 pallets you can incorporate into the main loop, and up to 3 windows can be used incorporated as well. The reliance on those pallets make them necessary to survive in late game, and I recommend saving them until on death hook.
The East side has a VERY strong corner area where a gen usually spawns. Save this gen for last. This gen getting done first (in combination with the outdoor gen) highly contributes to the kill rate on this map, as the killer would now have no reason to chase in this very strong area once the gen is gone. It is also by an entrance, so saving it for last would be extremely efficient in opening the gates for a teammate being chased.
The West side contributes extra pallets, and buffs a pointless window to usefulness near and in the Main Loop. The gen to save on this map is still the outdoor gen as it would force the killer to guard cross map gen locations.
If you really wanted to, you could loop these maps in a way that you would not be able to tell the difference between which one you are at, and it will come at no cost to your team. Staying in the middle common areas is beneficial to gen efficiency and spread, while also having the main loop that can be ran towards either direction of the building. If played right, it makes almost no difference which map (east or west) you end up playing on.
00:00:00 Map Philosophy & Example
00:06:32 Outside Area (cafe)
00:16:18 Broken Wall Room
00:27:42 Office & East Common Halls (Upstairs)
00:31:45 Crates (East Common Upstairs Long Pallet)
00:36:21 Niche Room (Pallet and Hole)
00:43:05 That "Bad" Window (West Common Window)
00:45:41 Library
00:51:52 Long Pallet & Waiting Room
01:01:41 Locker Room
01:08:05 Pointless Pallet (The Most Fun)
01:12:05 Front Desk
01:27:36 Escalators
01:41:39 Main Loop (Walkthrough)
01:49:15 Main Loop (Examples)
02:26:19 East RPD:
02:26:22 Shatter Room (East)
02:30:10 East Greed Room
02:32:26 East Under Stairs (By Entrance)
02:34:21 East Rooftop (Very Strong)
02:43:59 West RPD:
02:44:02 West "Bad" Window (Buff)
02:51:32 West Greed Room & Shelves
02:54:30 West Halls (Upstairs) & Long Pallet
03:01:34 West Entrance
03:04:23 In Review
03:07:49 Crossmap multitile Integration Chases
03:29:23 Outro


![[2023S8] GRAND FINALS Eternal vs Elysium | DBDLeague](https://i.ytimg.com/vi/Ln1sXmRjMHM/mqdefault.jpg)


![Strongest Killer Tier List [8.0.1]](https://i.ytimg.com/vi/Jbej9n8Zkc0/mqdefault.jpg)


