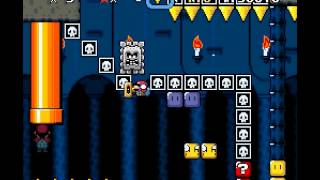
[TAS] Mario Must Die in
Frames: 51572
Rerecords: 116548
Here is the full TAS. This is the fastest completion of Mario Must Die that includes all stages, beating the old TAS ( • Mario Must Die TAS in 28:45 by MRO314... ) by 51905 frames (14:26.49).
This could be a very controversial strat, because, in the last stage, i skip one of the switches included in the old TAS, and spawned my own boss kill, but i think this should still count, because the old TAS also skips one of the switches, and also doesn't include the intended boss kill. In this case, this version of the hack (SMWC version) doesn't even have credits to be triggered. Not to mention that "Impossible Palace" is also faster in this version, since there isn't a powerup filter before the switch, meaning you can just go straight to it.
Anyways, this was a very fun hack to TAS, im impressed myself by just how much time i was able to save, and how optimized it ended up being.
Comments below
1:37 One of the differences between the version used in this TAS and the older TAS is that there used to be a throw block that got replaced by a coin on the left corner of the ceiling, so in theory, this should be faster on the older version.
2:34 No need setting up coin blocks when you can just get a double spring bounce!
4:16 I love how that slope assist tile is just in place for this clip to work.
5:37 In the other version, there used to be a shell with that mushroom.
5:50 Shoutouts to Noise for finding out about this yoshification. Special thanks to Noise and Dacin for helping me with it, some weird framerule was screwing me, making the gamemode you get while being the farthest to the right be $DF, i still dont know what was causing that to happen, but every attempt that i was a frame faster than in the current run, it would screw up the gamemode.
6:12 Breaking this stage was the best thing, it skips a giant layer scroll section that wastes a lot of time. This was also one of the hardest stages to break, and specially to optimize the route.
7:20 This is why it was so difficult to break this stage. When i was planning the route, i didn't realize there was another directional coin in the level (you can only trigger one of these in a level), so i had the idea of escorting the boo to the right while also riding it. Escorting the boo to the right, while also riding it WHILE also keeping it low enough, for you to get enough speed, and not be too close to the ceiling, and i did all of that, to try a Pjump into that wall, which was just barely possible.
8:21 The strat that i found for this boss was incredibly fun, extra powerup animations, so that all the hits on the big boo boss are completely optimal.
9:06 This stage is even more broken in the SMWC version, you just go straight into the pipe and enter the next door, and you have the switch.
11:16 This one of my favorite tricks in the entire TAS, i love how clever it is to use a Pswitch to keep you inside the wall, so you can walljump higher up, so you can save one bullet bill being shoot.
12:41 Shoutouts to Magikey for also finding this yoshification. This is one of the biggest breaks, it saves 4 minutes, if not more.
13:35 This is probably my favorite break i've ever found. Breaking this room was the most fun part of the TAS, it was completely shattered in pieces. Optimizing this was also very hard, i had to plan a lot, because some sprites that don't despawn were spawning on slot 7 (the blue yoshi egg near the end for example, which is why i went down, so the egg cracks and spawns a 1up, which can just despawn). Also, the hammer bro platform shares $151C, i got lucky that it spawned on slot 4, triggering the reznor kill.


![[TAS] Flying High Again 100% All Moons in 29:20.77 by StunnedByte](https://i.ytimg.com/vi/ujngxkJR95E/mqdefault.jpg)
![[TAS] Cool or Cruel 100% in 21:34.24 by StunnedByte](https://i.ytimg.com/vi/WXBIzzFbhXE/mqdefault.jpg)
![[TAS] The End](https://i.ytimg.com/vi/0PuCX9kteQ8/mqdefault.jpg)
![[TA] Armageddon](https://i.ytimg.com/vi/zpRytX3nKV4/mqdefault.jpg)
![[TAS] Advanced Shells III](https://i.ytimg.com/vi/nE2ezMKF_xg/mqdefault.jpg)
![[TAS] Sorrow and Misery (SMW Hack) 100% in 25:55](https://i.ytimg.com/vi/wOqLPGsvBYc/mqdefault.jpg)
![[TAS] Colon Three in 16:40.291 by StunnedByte (All rooms)](https://i.ytimg.com/vi/KAmcCW9bJhI/mqdefault.jpg)


![[TAS] ARMAGEDDON in 20:05.93 by xHF01x](https://i.ytimg.com/vi/S0jpNzkKVvU/mqdefault.jpg)

![[TAS] Kaizo Mario World 2 'cheatfest' by IgorOliveira666 in 22:11](https://i.ytimg.com/vi/LyBauDP8dM4/mqdefault.jpg)
![[TAS] GBA Metroid: Spooky Mission '100%' by Mikewillplays in 23:26.12](https://i.ytimg.com/vi/_utecx6Emmw/mqdefault.jpg)
![[TAS] Casio Mario World in 12:50.75 by xHF01x](https://i.ytimg.com/vi/MOSvZkvG3zs/mqdefault.jpg)


