Ten Stitch Blanket Tutorial

IMPORTANT NOTE: The pattern designer has updated and changed the pattern since this tutorial was released in 2013. The construction and the techniques used are the same, but the rowbyrow instructions I use in this video are different than written in the updated pattern. Please follow the pattern for rowbyrow instructions.
Follow this link to get your free copy of the pattern and follow along:
http://verypink.com/2013/08/28/tenst...
This pattern is designed by Frankie (Rosemily on Ravelry). You can see her other designs here:
http://www.ravelry.com/people/Rosemily
To learn more about Frankie's work with the Children's Liver Disease Foundation and to donate, visit her website:
http://www.justgiving.com/frankieskni...
Many thanks to Frankie for the great pattern!
Links to the different video parts
Part 1: Intro • Ten Stitch Blanket Tutorial
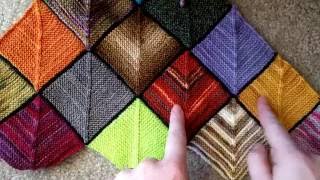
Part 2: Mitered Corners • Ten Stitch Blanket Tutorial
Part 3: Picking up stitches on the flat sides • Ten Stitch Blanket Tutorial
Part 4: Using markers to keep careful count • Ten Stitch Blanket Tutorial
Part 5: Finishing • Ten Stitch Blanket Tutorial
To see thousands of examples of this finished blanket by other knitters, visit the Ravelry project page:
http://www.ravelry.com/patterns/libra...
Information on things you'll see in this video:
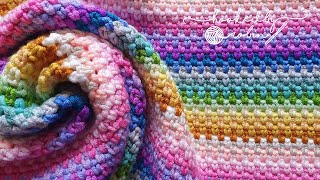
The yarn I used in my finished blanket is Berroco Vintage, in colors: cream 5104, purple 5155, and petunia 51105. I bought three hanks of each (but only used 2 of the cream), using size 7 US (4.5mm) needles. After machine washing and drying, my blanket is 40" square, with a gauge of 4.5 stitches per inch.
The bulky yarn I used for demonstration is Lion Brand Hometown USA. I demonstrated using size 13 US (9mm) needles.
Clippie markers like the ones I use can be found here:
http://www.knitpicks.com/holidayen/s...
The sweater on the mannequin is my Ombre Dyed Sweater, pattern and video tutorial:
http://verypink.com/2012/07/18/ombre...
To change color with a clean color break, start your new color in the first row of a mitered corner. Instead of slipping the last stitch in the first row of the mitered corner, knit all the way across. Then work the rest of the corner as written.
To bindoff at the end of this project, BO normally (knitwise) on the wrong side of the work.