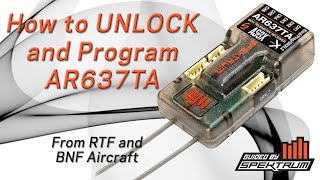
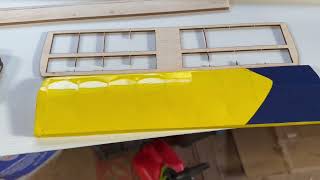
Your Conscendo has no flaps right? Mine does! With no airframe mods yours can too!

Disclaimer: The following is believed to work for all Spektrum iX/NX transmitters and the AR627TA receiver. The NX8 is used in this video. The DX transmitter series will also work if yours has Forward Programming available. Use at your own risk. Use your knowledge of your specific equipment and preferences to adjust settings as required. Carefully test aileron movement with and without SAFE and with and without flaps deployed before flying. No warranty, express or implied is made that this procedure will work for you. Improper programming of RC radio equipment can, and will, result in danger to property and people.
Bookmarks:
Start 00:00
Intro 00:12
Unlock receiver and add servo extensions 03:43
Program the transmitter 12:48
Program the receiver 26:42
Needed for this project:
Spektrum programing cable, $25 (http://tiny.cc/57jfvz)
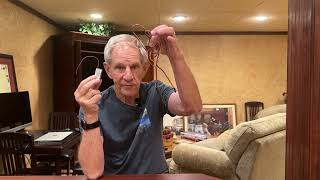
2 short servo extension cables (Try Amazon)
Spektrum Programmer app (http://spektrumrc.cachefly.net/apps/s...)
And, of course, a Conscendo and compatible transmitter!
1. If not already done, unlock the receiver using Spektrum programming cable and software.
2. Remove aileron Y cable and install 2 short servo leads on receiver ports 2 and 6. Color code these cables.
3. Create a new Acro, name it, and bind it to the transmitter.
4. Set up throttle cut on your usual switch and check that the motor does not start with throttle cut on.
5. Go back into System Setup
a. Set aircraft type to Flaperon, normal tail
b. Set a Flight Mode to a 3position switch (I use B) you will use for AS3X, Safe Select and Gyros off.
c. Set Spoken Flight Mode Name to the appropriate mode name. In my setup:
i. Flight mode 1 = SAFE Mode
ii. Flight mode 2 = Manual Mode
iii. Flight Mode 3 = AS3X Mode
d. Go to Channel Assign and Assign Aux3 to your flight mode switch (B in my case)
6. Color code the two wing aileron cables and plug in to the matching receiver cables.
7. Back out to the home page then to the first menu, then Servo Setup.
a. Set RAL and LAL travel to 150
b. Check the ailerons for correct movement.
c. If reversed, reverse both aileron servos.
d. Check elevator and rudder movement and reverse if necessary (should be OK)
8. Set Rates and Expo to personal preferences or per manual
9. Go to Flap System and set flaps for desired switch (G for me. These settings are flight tested on my airplane but may require Elev adjustment on yours. As explained in the video 40% is the max for flap deflection. Depending on how you like your flaps set a. and c. can be reversed.)
a. Set Pos 0 Flap 40%, Elev 11% (Landing Flaps)
b. Pos 1 Flap 10%, Elev 4% (Optional Takeoff Flaps)
c. Pos 2 Flap 0%, Elev 0%
d. Set Speed to 2 or 3 seconds, Linked
10. Optional, go to Mix and set a AILRUD mix for the Safe Select switch in the Safe Position. Rate 50% ands 50%, this helps making smooth coordinated turns in Safe Mode which you want might to use when flying thermals.
11. Range Test the model
12. Set Telemetry for desired voltage, altitude etc. callouts, if any
13. (Optional) Go to Audio Events and set up switch change audio responses.
14. (Optional) Go to Telemetry, do an AutoConfigure.
a. Set Smart ESC Status Reports to 60 sec.
b. Set any other optional telemetry module (altitude/variometer, GPS, etc.) settings for audio reports if desired. You can set the variometer to a switch to turn it on/off.
15. (Optional) Go to System Setup System Settings Next Extra Settings Volume Controls and set Analog to R Knob. NOTE: This seems to be broken in the latest 3.12 NX8 update. I had to revert to the prior version to get to the required page. Note: If you updated to firmware version 3.12 System Setup System Settings Preferences Visual Preferences Next Audio Settings Volume Controls
RECEIVER FORWARD PROGRAMMING is KEY to getting this all to work on this new Acro model you are setting up!
1. Go to Forward Programming First Time Setup and follow the directions to set up receiver orientation.
2. AS3X setting should be OK.
3. FMode Setup (These are for my setup, yours may be slightly different.) Use the selected Flight Mode switch (B for me) to select a Flight Mode.
a. Flight Mode 1 is Safe for my setup.
i . If not correct, set FM Channel to Switch B, AUX3
ii. AS3X: Inh
Iii. SAFE Mode: Self Level/Angle Dem
iv. Last 3 to Inh
b. Flight Mode 2 is No Gyro for my setup, all choices set to Inh.
c. Flight Mode 3 is AS3X for my setup.
i. AS3X: Act
ii. All others: Inh
4. Optional, if desired, and not suggested, go to SAFE and AS3X setting and adjust gains and angle settings. These work fine with the defaults.
5. VERY IMPORTANT! Do this any time you change a servo setting.
a. Got to System Setup and do a Relearn Servo Settings!
b. Failure to perform this step will almost certainly wreck a model if SAFE or AS3X is selected!